NordVPN Meshnet Discontinued? Here’s My Alternative with Tailscale
Posted on Aug 29, 2025 by Naveen Bose
When NordVPN announced they were discontinuing Meshnet, many of us lost a simple way to connect our devices remotely. I relied on Meshnet to access my Raspberry Pi, keeping all my internet traffic protected without interfering with remote access.
So, I decided to build my own solution. The goal was simple:
- Access my Raspberry Pi remotely and securely.
- Stay connected to NordVPN without losing LAN access.
- Make the setup persistent across reboots.
- Automatically reconnect if the VPN drops.
After some trial and error, I achieved it. Here’s how.
The Challenges
- Losing LAN access whenever I connected to NordVPN with Tailscale running.
- Tailscale becoming unreachable once the VPN was active.
- Needing a setup that would survive a reboot without manual reconfiguration.
- Ensuring auto-reconnection in case the NordVPN connection dropped.
The Solution
Instead of relying on Meshnet, I combined NordVPN’s whitelist/allowlist features, Tailscale, and a lightweight vpn_switcher script. This combination gave me:
- Full LAN and Tailscale access even while NordVPN is active.
- Automatic reconnection on failure.
- Persistence across reboots.
Step 1: Install and Configure NordVPN
sudo apt update
sudo apt install nordvpn
nordvpn login
Next, whitelist your local network and your Tailscale subnet. Remember to replace the placeholders with your actual subnets.
nordvpn whitelist add subnet <routersubnet>/24
nordvpn whitelist add subnet <tailscalesubnet>/10
This ensures your Pi stays reachable on your local network. I learned this the hard way: I forgot to whitelist, connected the VPN, and immediately lost my LAN connection because NordVPN overrides the default gateway. Also, don’t forget to disable NordVPN's killswitch and the old meshnet feature.
Step 2: Add Allowlist Ports
nordvpn allowlist add port 41641Check if the rules were added. This command shows all settings, including your whitelist and allowed ports:
nordvpn settings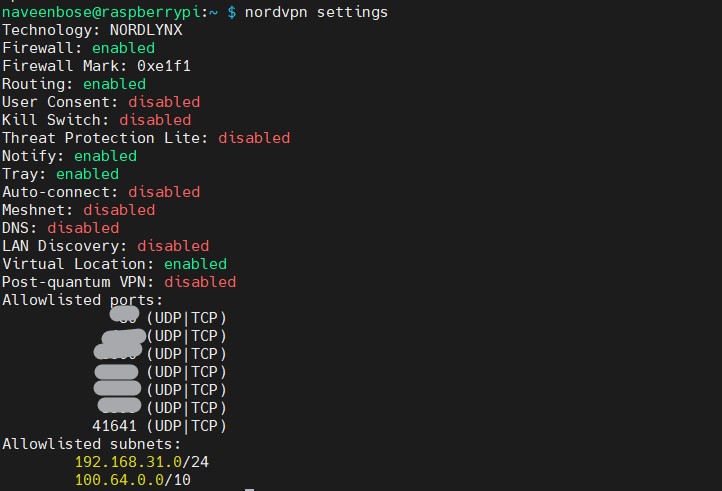
Why this matters:
- The LAN subnet keeps your local network alive.
- The Tailscale subnet keeps Tailscale alive.
- Port 41641 (UDP) allows Tailscale peer-to-peer traffic.
- Ports 443 & 80 (TCP) allow the Tailscale control plane when UDP is blocked.
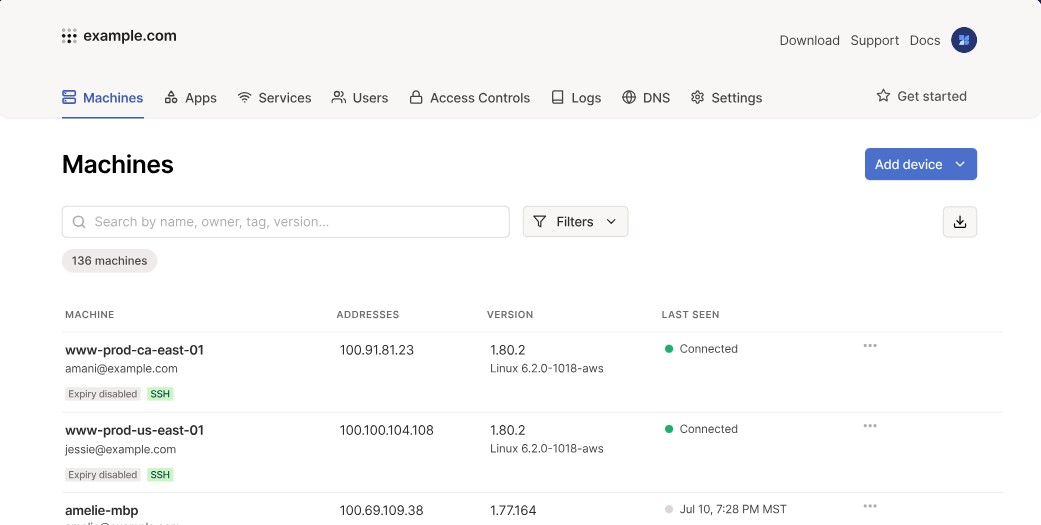
Step 3: Keep Tailscale Reachable
Install and configure Tailscale:
curl -fsSL https://tailscale.com/install.sh | sh
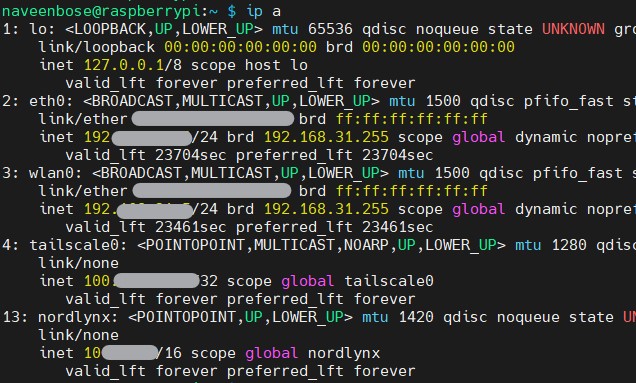
sudo tailscale upAfter logging in, verify connectivity before and after enabling NordVPN. With the whitelist configured, your Pi should remain accessible via its Tailscale IP.

Note: I ran into an issue where Tailscale overrode my DNS resolver. I couldn't reinstall it because tailscale.com was unreachable. I had to manually edit /etc/resolv.conf and set the primary nameserver to 8.8.8.8.
Step 4: Connect NordVPN After Tailscale
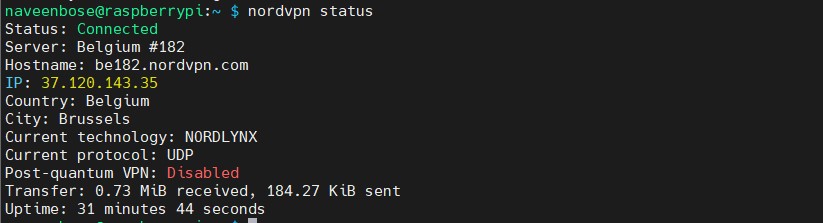
Manually connect to NordVPN and check connectivity, especially between your Tailscale IPs.
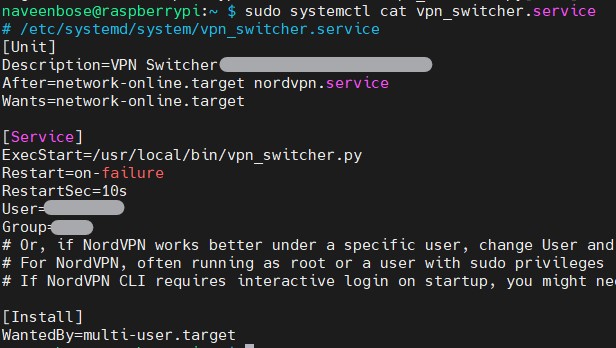
Step 5: Persistence Across Reboots
The vpn_switcher script can switch countries and run at boot. To achieve this, run the script as a systemd service.
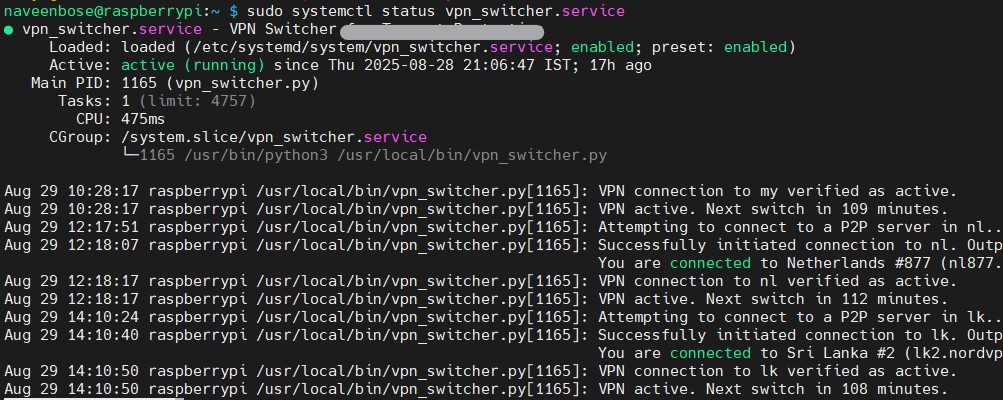
Final Result
- My Raspberry Pi stays reachable on LAN and Tailscale, even with NordVPN active.
- The setup survives reboots.
- If the VPN drops, the script reconnects automatically.
- Streaming and remote access work flawlessly.
Conclusion
While NordVPN is discontinuing Meshnet, it’s possible to build a reliable alternative. With some whitelisting, Tailscale, and a small custom script, my Raspberry Pi is now just as accessible—only more flexible.
This setup gives you full control and ensures you’re not locked into a feature that might disappear in the future.